
As July wears on, I’ve had several nights out imaging, and most of them successful. This, despite the fact that the targets I’m shooting are about 24-32 degrees high and directly over the selection in the image below.

That 128.88 is a measurement of radiance. It might as well be the middle of the day. My backyard is toward the upper left of the image and measures about 18-20. A good dark site on this radiance scale is under 1. In addition to imaging over this abuse of light, temperatures this July have been extra hot, and extra humid. The skyglow in the Southern sky has been almost unbearable. Despite this, I’ve been happy with my results so far.

This image is only 45 minutes worth of 90 second exposures on the Lagoon Nebula. M8 is big and bright, but tops out at 24 degrees low on a polluted and hazy southern sky.

I won’t say this is the hardest image to acquire, but taking a look at the unprocessed stack taken with a CLS filter will give you an idea of the level of how bad that sky really is.
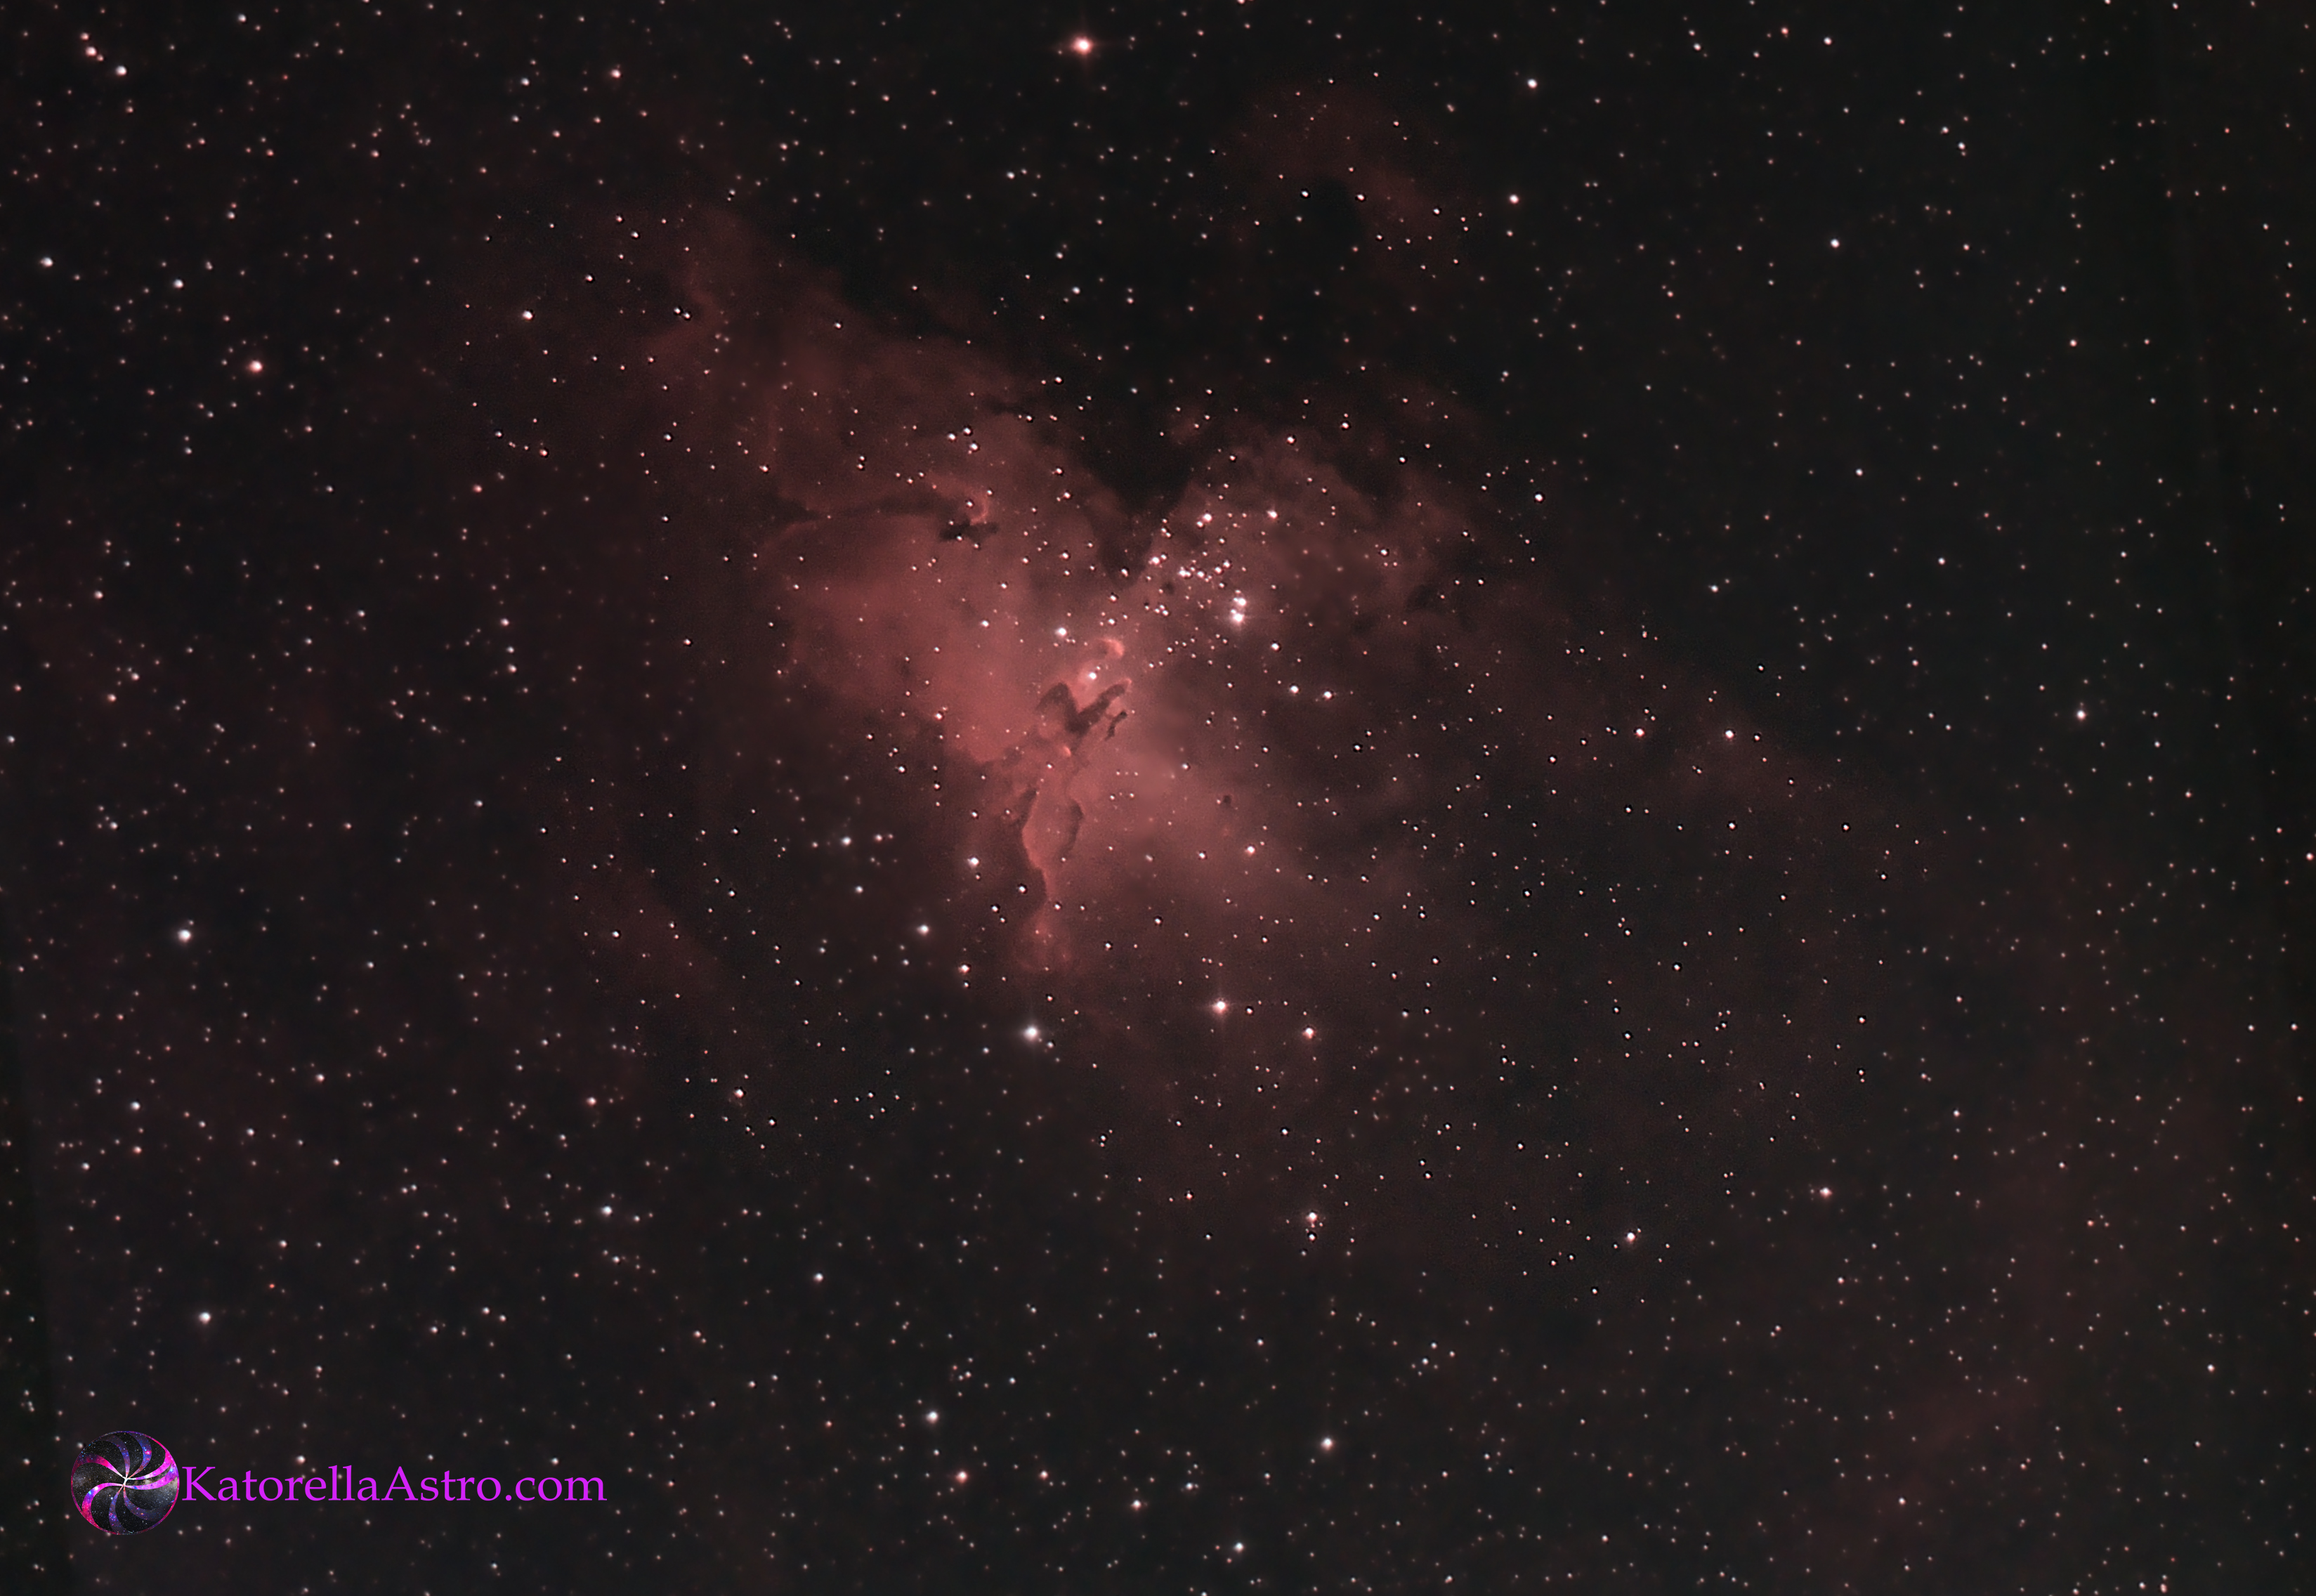
At least with the Eagle Nebula (M16) I can see a slight reduction in the sky glow as it rises in the sky. Notice the background color getting darker. These two examples are about an hour apart, with the one on the left being at the highest point it reaches in the sky. See further down the page for the processed version.


Filters
Light pollution sits at a specific range in the spectrum, unless you’re inundated with poorly aimed LED street lighting.

I use a CLS type filter that drops out completely for Sodium and Mercury lights, but maintains the transmission lines for nebulae. Here is an example of the Astronomik CLS filter. Required for heavy pollution.

This example shows the Hutech IDAS filter that still blocks the sodium and mercury light wavelength, but allows light between . This filter will give you a more natural color, but might allow more light in. Excellent for moderate pollution.
Camera
If you’re using a DSLR, and you want to take images worth your time and effort, I strongly recommend modifying the camera or even looking for an astronomy specific camera. All is not lost if your camera isn’t modified. I only just did mine recently. Check out this post for some tips for an unmodified camera.
Imaging in Severe Light Pollution (Unmodified DSLR)
Your options are slightly different with a modified , or astro-specific camera. Check out this link.
Imaging in Severe Light Pollution (Modified DSLR – Ha)
Taking Images
Make sure you take your darks and flats. Flats are essential against a polluted sky, and make all processing removal methods viable. If you’re imaging without flats against a polluted sky, you’re wasting your time. The gradients and vignetting will be severe and unmanageable. I guarantee it… from experience.
Processing
You can only combat light pollution so much with accessories. Nothing substitutes a dark sky, but in my case that is a couple hour drive away. I have to lean on processing and hope that I don’t destroy good data as I go through. In the processed product of M16, you see a nice dark sky with definition in the nebula. This was processed from a stack containing the red/brown sky images posted higher up on the page
I know, you get it. My conditions suck. Blah, blah. So how did I get from red sky to dark gray sky (Space isn’t black) without losing the object? I find free software options for as much as possible, but these are described for Photoshop. GIMP may have some similar functionality, but I honestly haven’t researched it.
One breakdown purchase was GradientXterminator. It kills gradients, and balances the background color (if you choose to), removing the ugly red/brown tinge. It’s on the expensive side for an add-in to Photoshop, but I use it on every image I take, so its definitely worth the $50US price tag. You can remove gradients manually, as described here by Trevor for AstroBackyard.com, but even he uses GradientXterminator.
There are two quick manual methods to remove the light pollution in Photoshop. These have all been described time and again, so I’ll just point to links. The first is in the levels menu, described here in a Sky and Telescope article. The other is using the curves tool to balance the background color, described here. The curves tool instructions are not astrophoto specific, so you’ll want to set the black point to 35,35,35 as is instructed in the levels instructions.
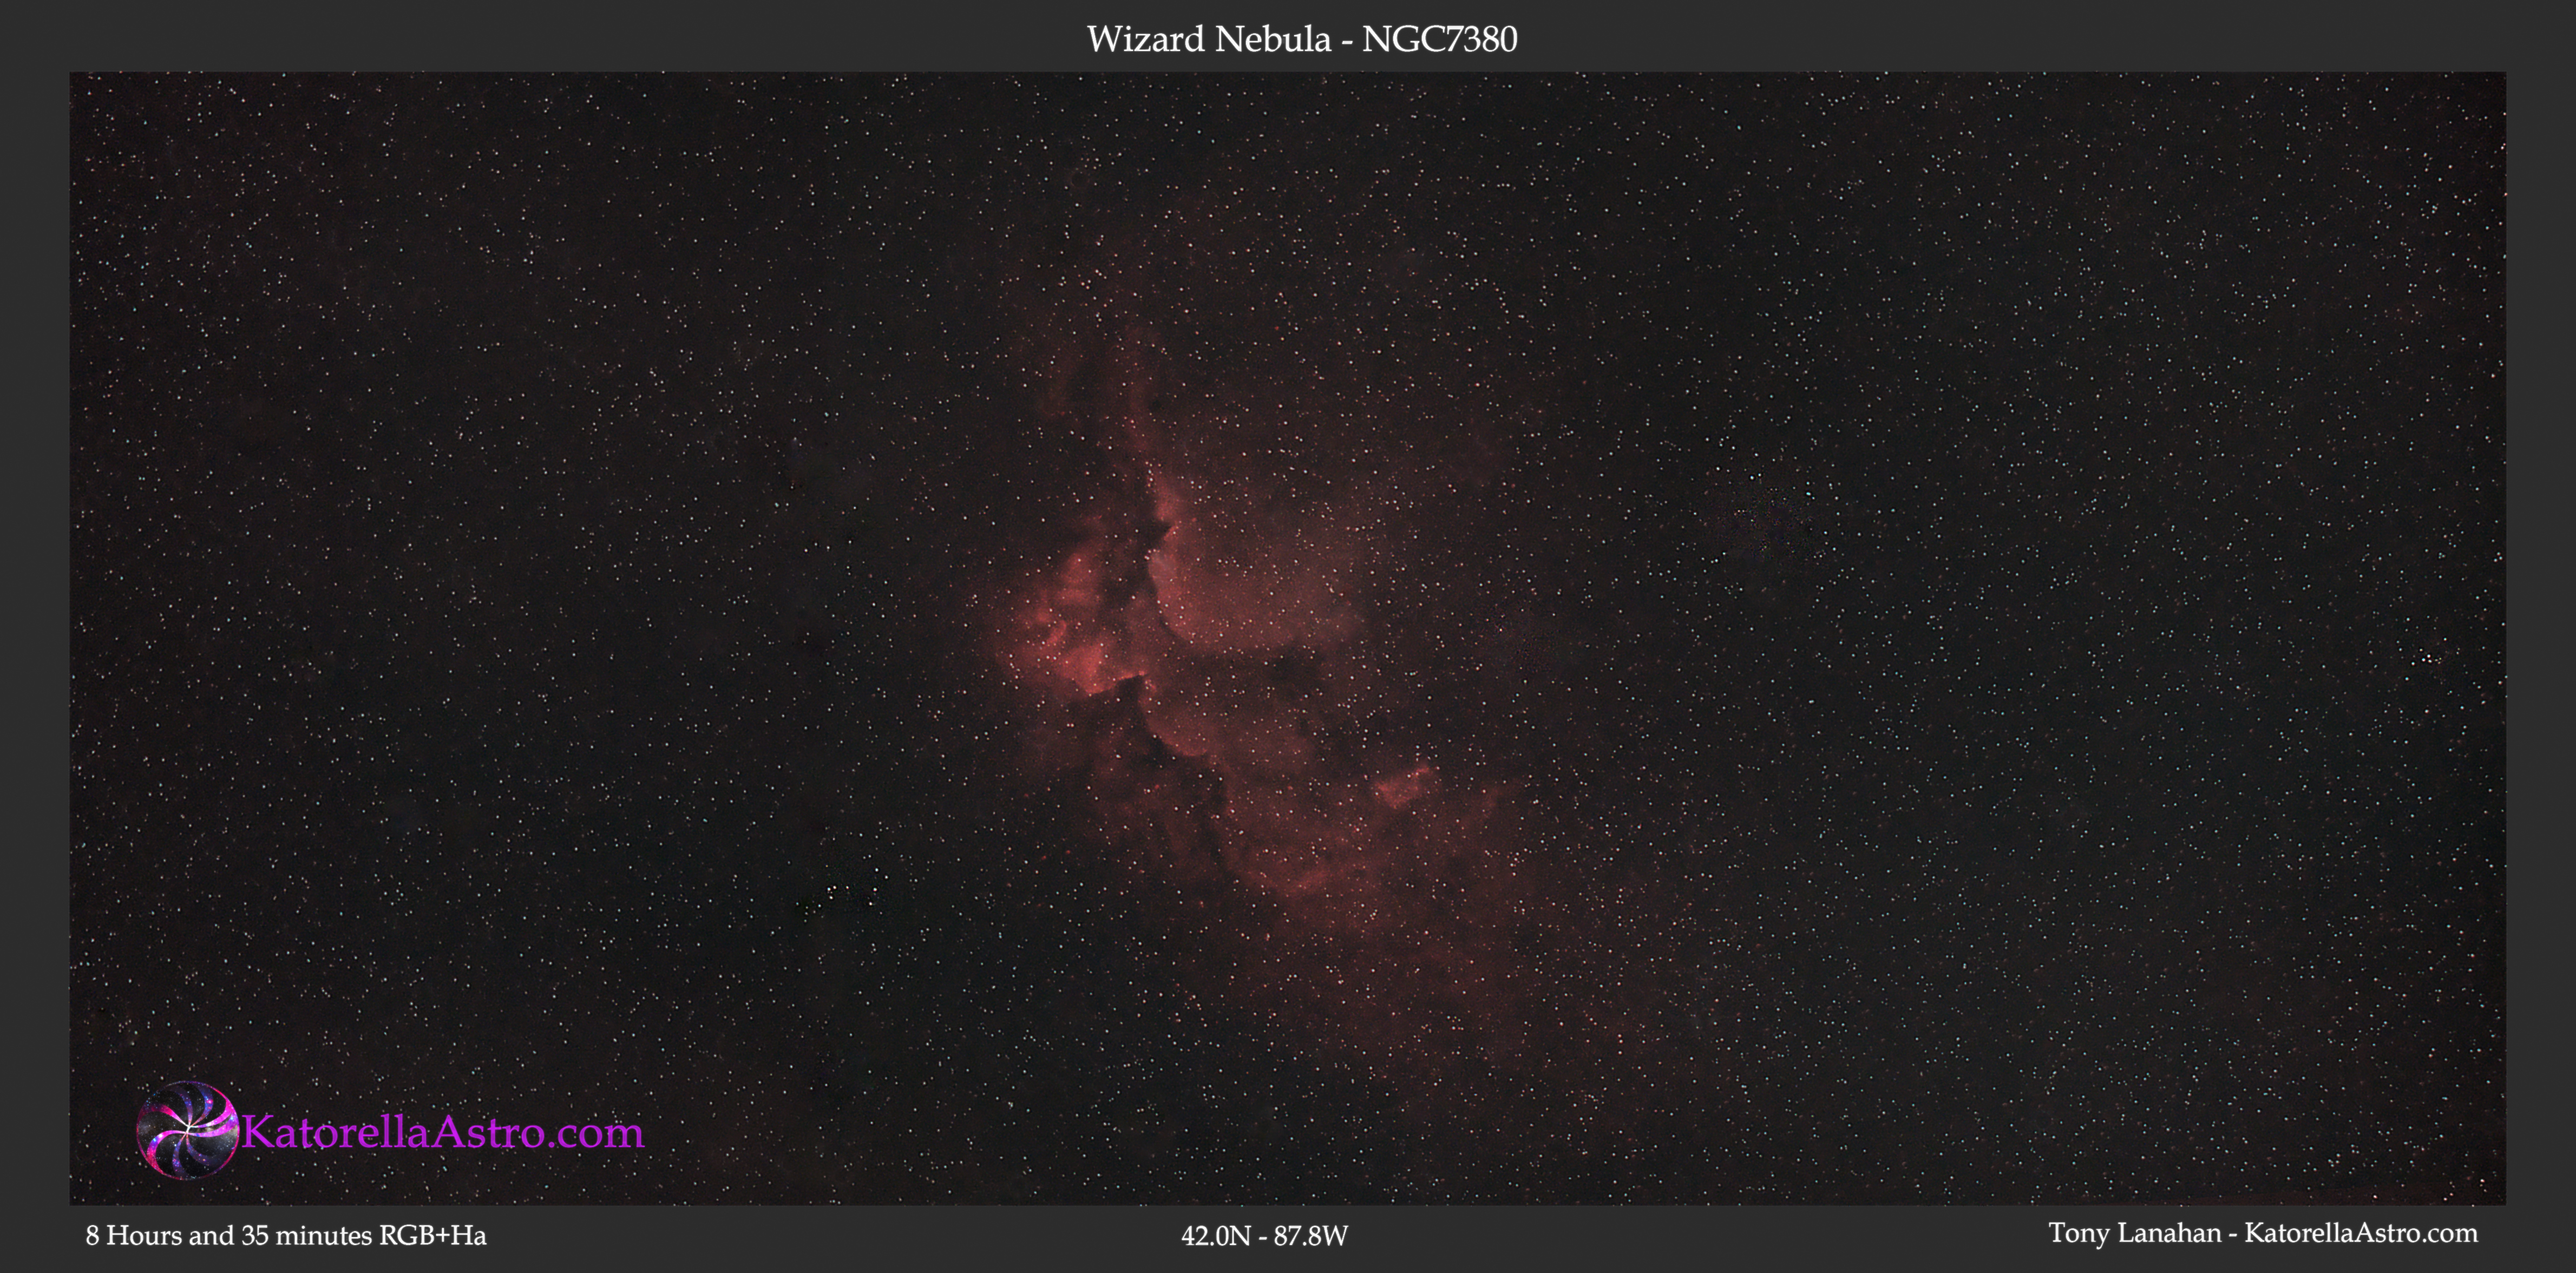
As mentioned in other posts – more, slightly shorter exposures, watching your histogram and allowing for time and patience is key if you want to image from a city or the burbs. Try to pick targets that are as high in the sky as possible so you’re shooting through less atmosphere. If you’re in a bad spot, you’ll have to rely a lot on processing methods to remove skyglow and light pollution. Take your time and experiment. Everyone’s conditions are different, but if I can pull out the Wizard two miles from O’Hare airport, you can image too.
.
Clear Skies, Bleary Eyes – KA

One thought on “Even More About Light Pollution”